Floyd
Rose Tremelo Installation |
|
|
|
|
|
|
|
1.
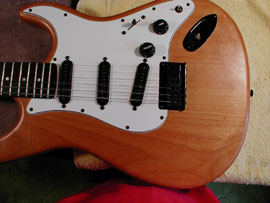
This customer wanted to put a
Floyd Rose tremelo bridge into his Carvin hardtail guitar. I made
sure this is really what he wanted because it requires a good deal
of routing and once you take the wood away you cannot put it back. |
|
|
|
|
|
|
|
|
|
|
|
|
|

|
2.
The first step, obviously, is to remove the pickguard, bridge, and
jack. Then I had to measure and measure again. I have to be precise
in my measuring because like I said, you can't put the wood back
after you rout.
|
|
|
|
|
|
|
|
|
|
|
|
|
|
|
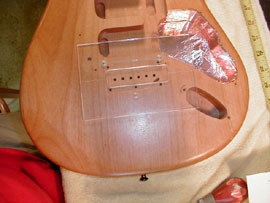
3.
Once I was sure about the placement of the bridge rout I placed
the template on the guitar and screwed it into place. I want the
template to be as securely fastened as possible. |
|
|
|
|
|
|
|
|
|
|
|
|
|
|
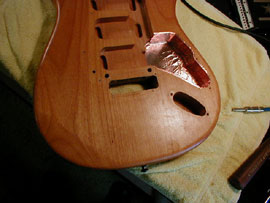
4.
The first rout is complete and I have also drilled the holes for
the bridge studs.
|
|
|
|
|
|
|
|
|
|
|
|
|
|
|
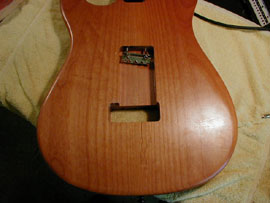
5.
Here, I have completed the back rout and installed the spring
claw.
|
|
|
|
|
|
|
|
|
|
|
|
|
|
|
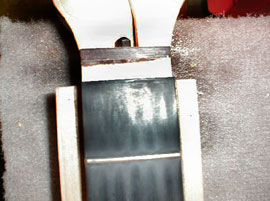
6.
This is not a good picture but I'll try to explain. Since this
is a tilt-back headstock there is no flat area for the locking
nut to be seated. So I glued a piece of rosewood onto the
headstock where the locking nut will go and then routed a level
area for the nut. It's hard to see in this picture but it came
out nicely.
|
|
|
|
|
|
|
|
|
|
|
|
|
|
|
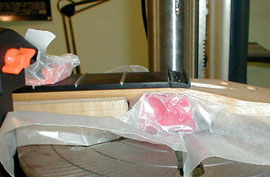
7.
Here I am drilling the holes for the screws that hold the nut
into place. They go clear through the neck and must be recessed
on the back of the neck to allow room for the head of the screw.
That red thing under the neck is a block of clay. That keeps the
wood from blowing out of the exit area.
|
|
|
|
|
|
|
|
|
|
|
|
|
|

|
8.
After I modified the pickguard to fit the new bridge assembly, I
put the guitar back together and set it up. It turned out nicely
and now this fella can do those divebombs until the cows come
home and stay in tune.
|
|
|
|
|
|
|
|
|
|
|